ARM Single Board Computer (SBC) Installation
Fedora Server is also available for various Single Board Computers (SBC) like the well-known Raspberry Pi. Installation works quite different, though. But in the end Fedora Server works on application level exactly as otherwise familiar.
How it works
Single board computers originally had only one data storage medium, an SD card. The device expects a ready-to-use operating system, configured precisely for the respective hardware. This original principle is still maintained today and is the universal method provided by every SBC model.
Therefore, Fedora Server Edition is distributed as an image file, and installation is a matter of transferring this image file to the designated storage medium, traditionally an SD card. The various SBCs differ significantly in hardware features and architecture. Instead of creating a separate distribution file for each model, Fedora distributes a unified image file. A special program, arm-image-installer, transfers the image and adapts it to the target model.
Many SBC models today offer additionally alternative storage media, especially eMMC memory, either pluggable or soldered. These SBCs can alternatively boot and operate directly from this remarkable faster memory. A pluggable memory can be connected to the desktop with an adapter instead of the SD card. In case of soldered memory, you must first go through the installation process with the SD card, and then use that system to copy an installation image to the internal eMMC memory in a second step.
Some models can also support extended firmware, usually in the form of SPI modules that allow further selections during boot, e.g. NVMe boards, SATA drives, or USB sticks. This requires separate, model-dependent installation steps. It is best to perform the basic installation described here first.
Prerequisites
-
Of course, you need a suitable single board computer model, supported by Fedora and with a network connection, keyboard and display. A simple text console is perfectly sufficient.
The critical passage is "supported by Fedora". When choosing a device for Fedora Server, check carefully if it is really actually supported. Unlike the x86 universe, don’t expect everything to work just as smoothly in ARM rsp. aarch64. Take everything with a grain of salt. It is best to ask in advance on the arm mailing list. The section Fedora Server on Single Board Computers provides additional information.
-
A Fedora system, which provides the Fedora utility program, arm-image-installer.
The utility should basically be usable with any Linux desktop, but not with Windows or MacOS. You have to install VirtualBox or any other virtualization software that is able to provide direct access to the physical USB port or SD card slot, and install Fedora as a guest system.
-
A pluggable disk of suitable size, practically, this is either an SD card or eMMC storage on a removable daughter board. The absolute minimum capacity is 8 GB, but a capacity of 32 GB should be fine and affordable nowadays.
Special considerations: Organization of the storage area
Basically, Fedora Server on SBC follows the same storage configuration principles as on 'full-blown' Server Hardware. Please, read the section "Storage organization" in the installation overview and the supplementary information in the Post installation tasks section. Fedora Server Edition implements this principle, which originated in professional IT, on SBCs as well.
Fedora uses UEFI as the boot system, but on SBCs it still uses a DOS/MBR partition table. Therefore, it first creates a FAT partition for EFI and a small /boot partition, used by grub2 bootloader. Thereafter, it creates another partition including one LVM volume group (VG) as described in the forementioned guide.
For practical reasons, the downloaded deliverable is limited to just under 8 GB in total. During or after installation, the size is adjusted to the existing hardware.
Steps to install Fedora Server Edition on a Single Board Computer
Preparations
-
On your Fedora system, install arm-image-installer
[…]$ sudo dnf -y install arm-image-installer uboot-images-armv8.noarch -
Set the download directory as default, fetch a Fedora Server aarch64 system disk raw image, here F38, and check the integrity of the download.
[…]$ cd ~/Downloads
[…]$ wget https://download.fedoraproject.org/pub/fedora/linux/releases/38/Server/aarch64/images/Fedora-Server-38-1.6.aarch64.raw.xz  -O Fedora-Server-38-1.6.aarch64.raw.xz
[…]$ wget https://download.fedoraproject.org/pub/fedora/linux/releases/38/Server/aarch64/images/Fedora-Server-38-1.6-aarch64-CHECKSUM
[…]$ sha256sum -c *-CHECKSUM  --ignore-missing
The result message includes a complain about some not correct formated lines. It can savely be ignored.
-
Connect your Micro SD card to your desktop. Identify the device name.
[…]$ lsblk NAME MAJ:MIN RM SIZE RO TYPE MOUNTPOINT sda 8:0 0 596,2G 0 disk ├─sda1 8:1 0 600M 0 part /boot/efi ├─sda2 8:2 0 1G 0 part /boot ├─sda3 8:3 0 30G 0 part │ └─sysvg-root 253:0 0 15G 0 lvm / └─sda4 8:4 0 564,6G 0 part ├─usrvg-var_log 253:1 0 5G 0 lvm /var/log └─usrvg-libvirt 253:2 0 200G 0 lvm /var/lib/libvirt mmcblk0 179:0 0 29,5G 0 disk └─mmcblk0p1 179:1 0 29,5G 0 part zram0 252:0 0 7,5G 0 disk [SWAP] -
In the above example the device is obviously /dev/mmcblk0 and its partition (mmcblk0p1) is not mounted anywhere. If it were, you would have to unmount the device.
[…]$ sudo umount /dev/mmcblk0p1 -
Identify the name of the support files for your board
[…]$ sudo arm-image-installer --supported
AllWinner Devices:
A10-OLinuXino-Lime A10s-OLinuXino-M A13-OLinuXino A13-OLinuXinoM A20-OLinuXino-Lime A20-OLinuXino-Lime2
A20-OLinuXino-Lime2-eMMC A20-OLinuXino_MICRO A20-Olimex-SOM-EVB Ampe_A76 Auxtek-T003 Auxtek-T004 Bananapi
...
TI Devices:
am335x_evm am57xx_evm kc1 omap3_beagle omap5_uevm omap4_panda
Note: For the am33xx BeagleBone devices use 'am335x_evm', BeagleBone AI use 'am57xx_evm'

MVEBU Devices:
clearfog helios4

ST Devices:
stih410-b2260

Other Devices:
arndale chiliboard cl-som-am57x rpi2 rpi3 rpi4 olpc_xo175
If you don’t find your board, check the boards.d directory directly just in case the list is not up to date.
[…]$ ls -al /usr/share/arm-image-installer/boards.d | lessAs an example., you will find the PINE64 "ROCKPro64" model as "rockpro64-rk3399"
-
Transfer the raw disk image to the micro SD card
[…]$ sudo arm-image-installer --image=Fedora-Server-38-1.6.aarch64.raw.xz --target=rockpro64-rk3399 --media=/dev/mmcblk0The output lines contain the error message "sed: /tmp/fw/EFI/fedora/grubenv … File or directory not found". Ignore it safely.
Just in case you already decided to fill the complete space on disk with the root file system and to dispense with segmentation, you may add the resizefs parameter which would result in an alternative command line:
[…]$ arm-image-installer --image=Fedora-Server-38-1.6.aarch64.raw.xz --target=rockpro64-rk3399 --resizefs --media=/dev/mmcblk0Remember, this is definitely not a recommended option for serious production server operation!
Consult the ARM Installation Guide for a complete description of the available options.
-
After the transfer is complete, unmount the SD card again if it was automatically re-mounted, and disconnect it.
Basic installation and configuration
At the SBC terminal, we perform only the minimum, absolutely necessary configuration, namely the creation of a user including password and administrative privileges. Just in case your network doesn’t provide DHCP, you have to configure the IP address as well. Everything else can be more conveniently accomplished via ssh or Cockpit from the desktop.
-
make sure that the SBC is disconnected from power.
-
Connect monitor, keyboard and network cable, insert the micro SD card.
-
Connect the SBC to power and wait. After some time a lot of messages scroll across the screen. If the network interface doesn’t provide DHCP, in includes a NetworkManager error message. You can safely ignore it for now. It finally ends with a simple, text-based input mask for the first boot configuration.
U-Boot 2023.04 (Apr 04 2023 – 00:00:00 +0000)

SoC Rockchip rk3399
Reset cause: POR
Model: Pine64 RockPro64 v2.1
...
...
[  OK  ] Reached target nss-user-lo ... User and Group Name Lookups.
         Starting systemd-logind.se... User ÖLogin Management ...
[  OK  ] Finished dreacut-shutdown,s .... /run/initramfs on shurtdown.
================================================================================
================================================================================

1) [x] Language settings                 2) [x] Time settings
       (English (United States))                (US/Eastern timezone)
3) [x] Network configuration             4) [x] Root password
       (Connected: end0)              (Root account is disabled)
5) [ ] User creation
       (No user will be created)

Please make a selection from the above ['c' to continue, 'q' to quit, 'r' to
refresh]:
The menu is quite simple and a bit old-fashioned, but effective and straightforward. Select the item you want to configure by entering the digit in front of it and then follow the corresponding submenu displayed in the same way. An 'X' in the square bracket indicates that an item is already configured or preconfigured with default values.
-
The most important item is the configuration of an admin user and their password. Type 5 to enter the submenu.
================================================================================
================================================================================

User creation

1) [ ] Create user

Please make a selection from the above ['c' to continue, 'h' to help, 'q' to
quit, 'r' to refresh]:

1

================================================================================
================================================================================

User creation

1) [x] Create user
2) Full name
3) User name
4) [x] Use password
5) Password
6) [x] Administrator
7) Groups
   wheel

Please make a selection from the above ['c' to continue, 'h' to help, 'q' to
quit, 'r' to refresh]:
The "[x]" in front of Create user indicates that you entered "1" (to create user) and now the user creation process is active. Accordingly, password authentication is enabled for the new user as well as administrator privileges and membership of the wheel group.
Fill in the full name, the user name and the password. If you are on a non-US keyboard note that no keyboard mapping is active and limit yourself to universal standard ASCII characters and avoid special characters for now. Otherwise, you might later not be able to enter the password correctly, because a different keyboard mapping applies. You can change the password to a more secure value later. In any case ensure that you keep administrator privileges unchanged!
If you enter a "c", the user configuration will be closed and you will return to the original main menu.
-
If you do not live in the US/Eastern time zone, it would be wise to set it here as well. It is very simple and straight forward in the menu. Type '2' and select the correct values from the lists. Enter "c" to close it.
Usually, leave the ntp server as is.
If you are uncomfortable with the entry here, you can also enter this and all the following information later comforatbly with the Web interface.
-
If you don’t have a DHCP server on your LAN you may configure network connection in this menu or use the command line in the next stage. Specifically it you use a non-US keyboard it may be tedious and error prone to use this menu.
Even with DHCP active, it may be useful to set the hostname here, so that an internal DHCP-based name server receives the correct name immediately. Type "3" and fill in your hostname.
-
Finally, type 'c' to exit the first-boot configuration menu and complete the basic configuration. After some waiting, the Fedora Server login prompt appears.
Fedora Linux 38 (Server Edition)
Kernel 6.2.9-300.fc38.aarch64 on an aarch64 (tty1)

Web console: https://localhost:9090/ or https://192.168.158.172:9090/

rockpro login:
The hostname here is default, because the box didn’t receive a name from DHCP during first boot. Please note the IP address to use next with ssh or Cockpit.
Always complete this step and close with 'c'. Otherwise this installation routine can on reboot again and again conflict with the subsequent configuration.
-
If you have the network connection ready, you can now disconnect monitor and keyboard. The next steps all happen on the desktop.
Otherwise configure the network connection now.
-
Login with your administrative account
-
If you are a non-US keyboard user, configure your keyboard mapping. Fist list the available keyboard mappings and note the name of a suitable mapping, e.g. de-nodeadkeys. Then configure it.
[…]$ localectl list-keymaps
[…]$ sudo localectl setkeymap de-nodeadkeys
The mapping is imediately active.
-
Configure and activate the network. Adjust the IP, gateway and network settings accordingly.
First, check the existing interfaces.
[…]# nmcli con
NAME                  UUID                                  TYPE      DEVICE
'Wired connection 2'  8d971f49-033f-398a-9714-3a4e848178fb  ethernet  enp2s0
Most likely your interfaces are named somewhat awkward way. Let’s fix that to make administration of network easier and more comfortable. Don’t forget to adjust the naming to your specific installation!
[…]$ sudo nmcli con mod 'Wired connection 1' connection.id end0 […]$ sudo nmcli con mod end0 \ ipv4.method manual \ ipv4.address "xxx.xxx.xxx.xxx/yy" \ ipv4.gateway "xxx.xxx.xxx.zzz" \ ipv4.dns "xxx.xxx.xxx.vvv" \ ipv6.method manual \ ipv6.addresses xxxx:xxxx:xxxx:xxxx::yyyy/64 \ ipv6.gateway xxxx:xxxx:xxxx:xxxx::zz \ ipv6.dns "xxxx.xxxx.xxxx.xxxx::vvv" \ connection.zone "FedoraServer" […]$ sudo nmcli con up end0 […]$ sudo systemctl restart NetworkManager -
Reboot. You can then disconnect monitor and keyboard. The next steps all happen on the desktop.
-
Final Configuration
-
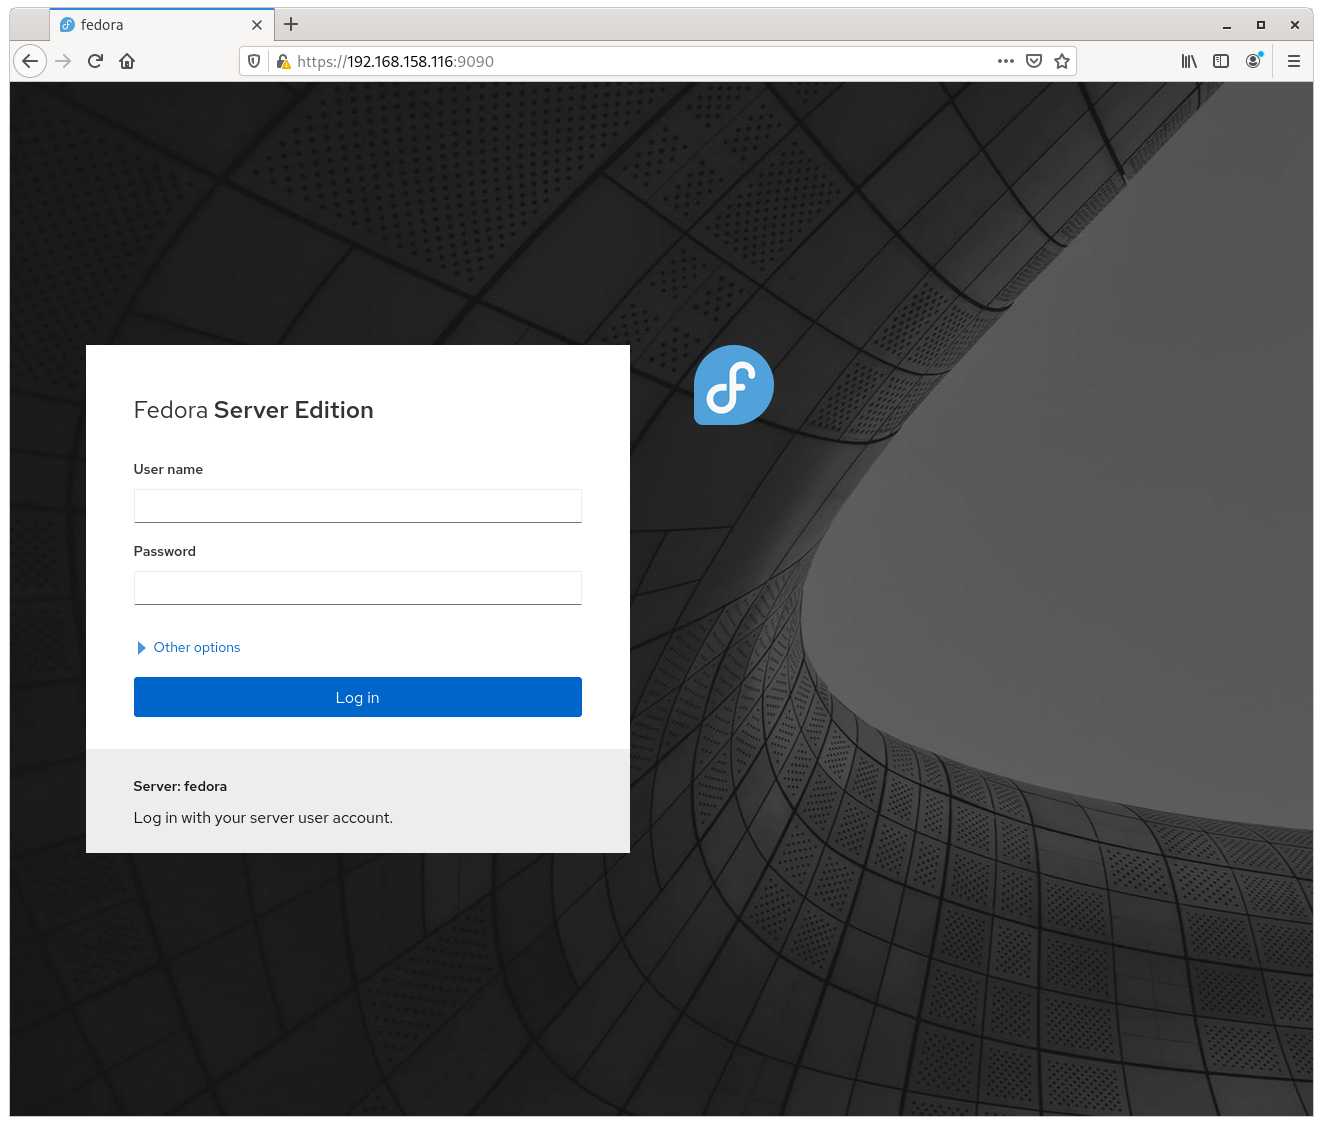
On your desktop open a Browser. If you already set the correct hostname and DNS entry, use that. Otherwise, use the IP address for now. In the example above it is http://192.168.158.172:9090. After accepting a warning message due to a missing certificate, voilà, the Cockpit administration interface of your SBC appears.
-
Login with your administrative account to continue configuration.
Activate administrative permissins in the top bar.
-
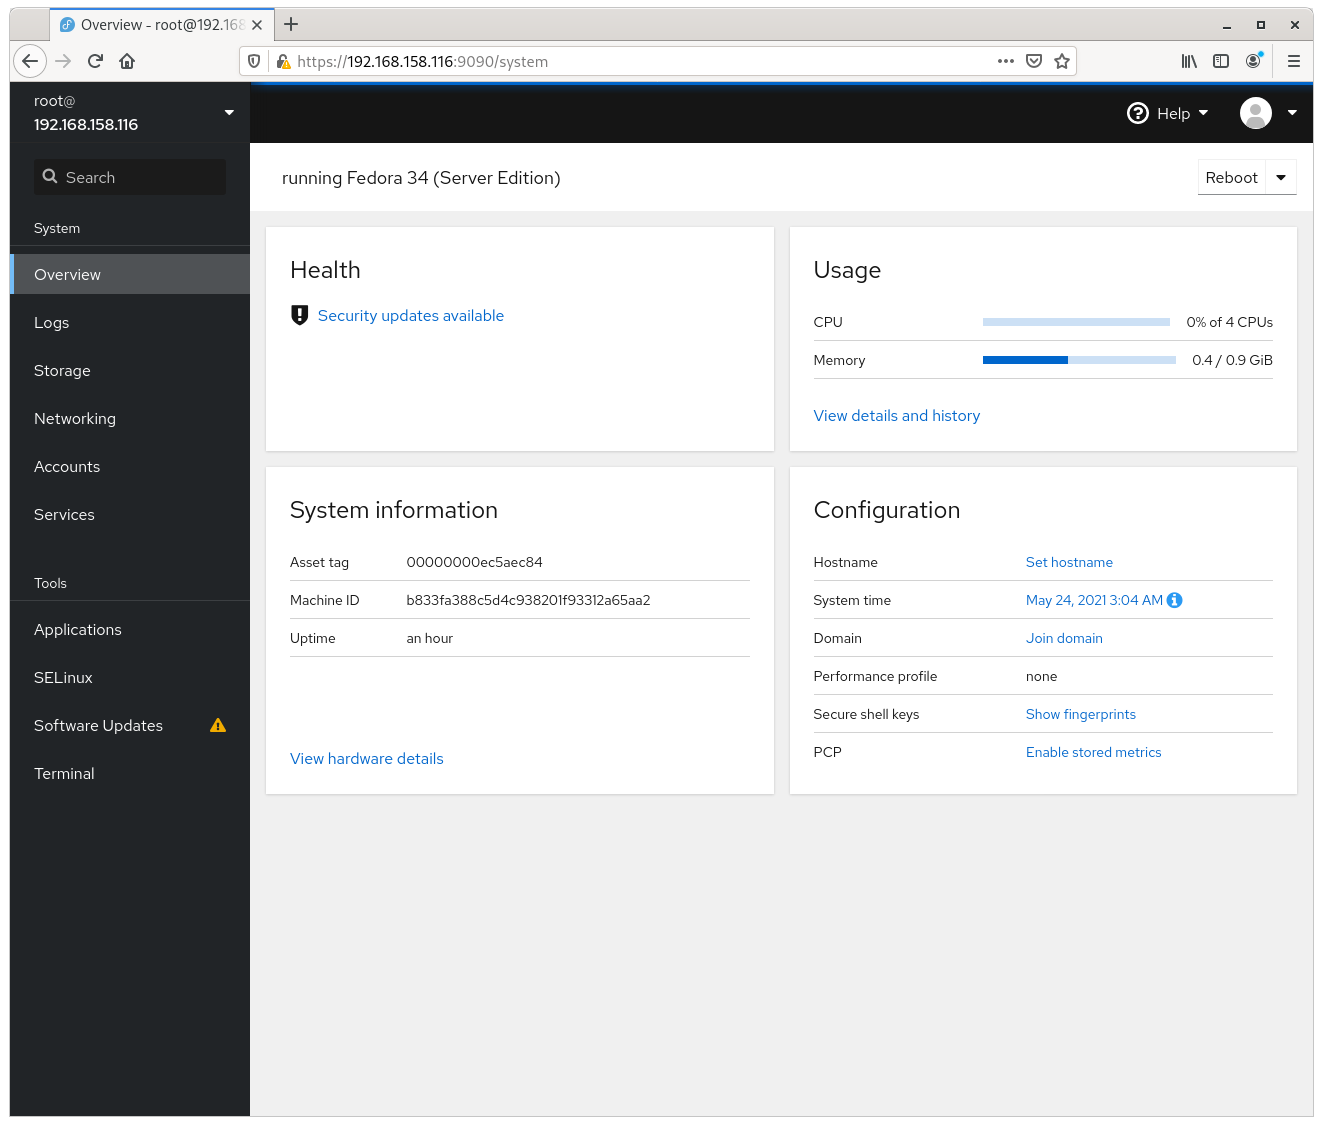
First adjust hostname
In the Box "Configuration" click on "edit" beside the hostname and enter a short name (display name) and a fqdn name.
-
Adjust time and time zone if necessary and not already done. Click on system time and select the time zone. Automatic time synchronization should already be enabled.
If a local time server is available in your network, it can be entered here. Many routers offer such a function and relieve the infrastructure.
-
If you are non-US you may want to set your language. In any case, you should choose the keyboard layout correctly. Otherwise, in case of an emergency you may have to use a directly attached monitor and keyboard again, you need a correct mapping to act efficiently.
Select "Terminal" in the left navigation menu. You get a terminal access to your device, already logged in with your account.
-
List available languages by "localectl list-locales". Find your locale in the list and note the token, e.g. de_DE.UTF-8. Set the language with "sudo localeectl set-locale LANG=TOKEN", e.g. "sudo localeectl set-locale LANG=de_DE.UTF-8".
-
List available keyboard mappings by "localectl list-keymaps". Find your keymap in the list and note the token, e.g. de-nodeadkeys. Set the keymap with "sudo localectl set-keymap MAP_TOKEN", e.g. "sudo localectl set-keymap de-nodeadkeys".
-
Finally check by "localeectl"
-
-
To be able to access your account via ssh, you should install your public ssh key.
Select "accounts" in the left navigation column and choose your account. At the bottom select "Add Key". Copy&paste your public key into the input field.
If you chose a simple password during the basic installation, you should replace it with a more complex one at this occasion.
-
Most likely, the packages of the distributed file image are not up to date. In the menu bar on the left, you will probably see an exclamation mark next to "Software Updates". Select this menu item. A search for updates starts and after some time a list of updates appears. Select "Install all updates" and sit back. It will take a while.
If the cockpit packages are also updated, the connection is interrupted. You must then reconnect.
With everything done reboot the system. In the overview screen select either reboot or shutdown in the upper right corner. You can now use a shutdown to disconnect keyboard and monitor, if desired. You may also put the device in a different, final place. Start the device afterwards.
-
When the device is up again it is time to test the installation.
-
If your DHCP is correctly configured, you should be able to find your device by name now. Close your browser window and start again. Write the device name and port number in the address field, e.g. http://rockpro.example.com:9090 and Cockpit should come up again (after the usual warning about an insecure connection).
-
You should be able to log in via ssh and your key. Try ssh -i .ssh/MYKEY rockpi.example.com and after answering a question to accept the fingerprint you should gain access.
-
-
Finally, depending on the use case, you may need to ensure you can always track which person was logged in and when. Use Cockpits account management feature to comfortably create additional users and grant them administrativ permissions ("sudo").
Configuration of the storage area
As explained at the beginning, there are at least three alternatives to organize the storage area.
-
Filling all the space left after the base installation with the ROOT file system.
This is the simplest solution and the only sensible one for disks of up to 16gb.
-
Extend the partition and volume group to the remaining available disk space, extend the logical volume with the ROOT file system to about 12gb and leave the remaining area for logical volumes for dedicated payloads (database, libraries, etc.).
This is the most flexible solution and preserves all options for the system administrator depending on the actual progression of usage. It is especially recommended for disks of 64gb and more, but should also be considered with a size of 32 gb.
-
You may reinforce the rationale of separating system and user data even further and create a separate partition and volume group for user data. This seems a bit far-fetched for a (small) SBC, but is nevertheless worth considering if a very large volume and correspondingly a large amount of data are present (a rule of thumb: larger 500 GB).
Enlarge partition and volume group to fill the disk space
Any of the alternatives as above start with the same administrative tasks.
-
Login via ssh or switch to terminal in Cockpit
-
Use lsblk to determine the device name of your disk storage, most likely mmcblk1
-
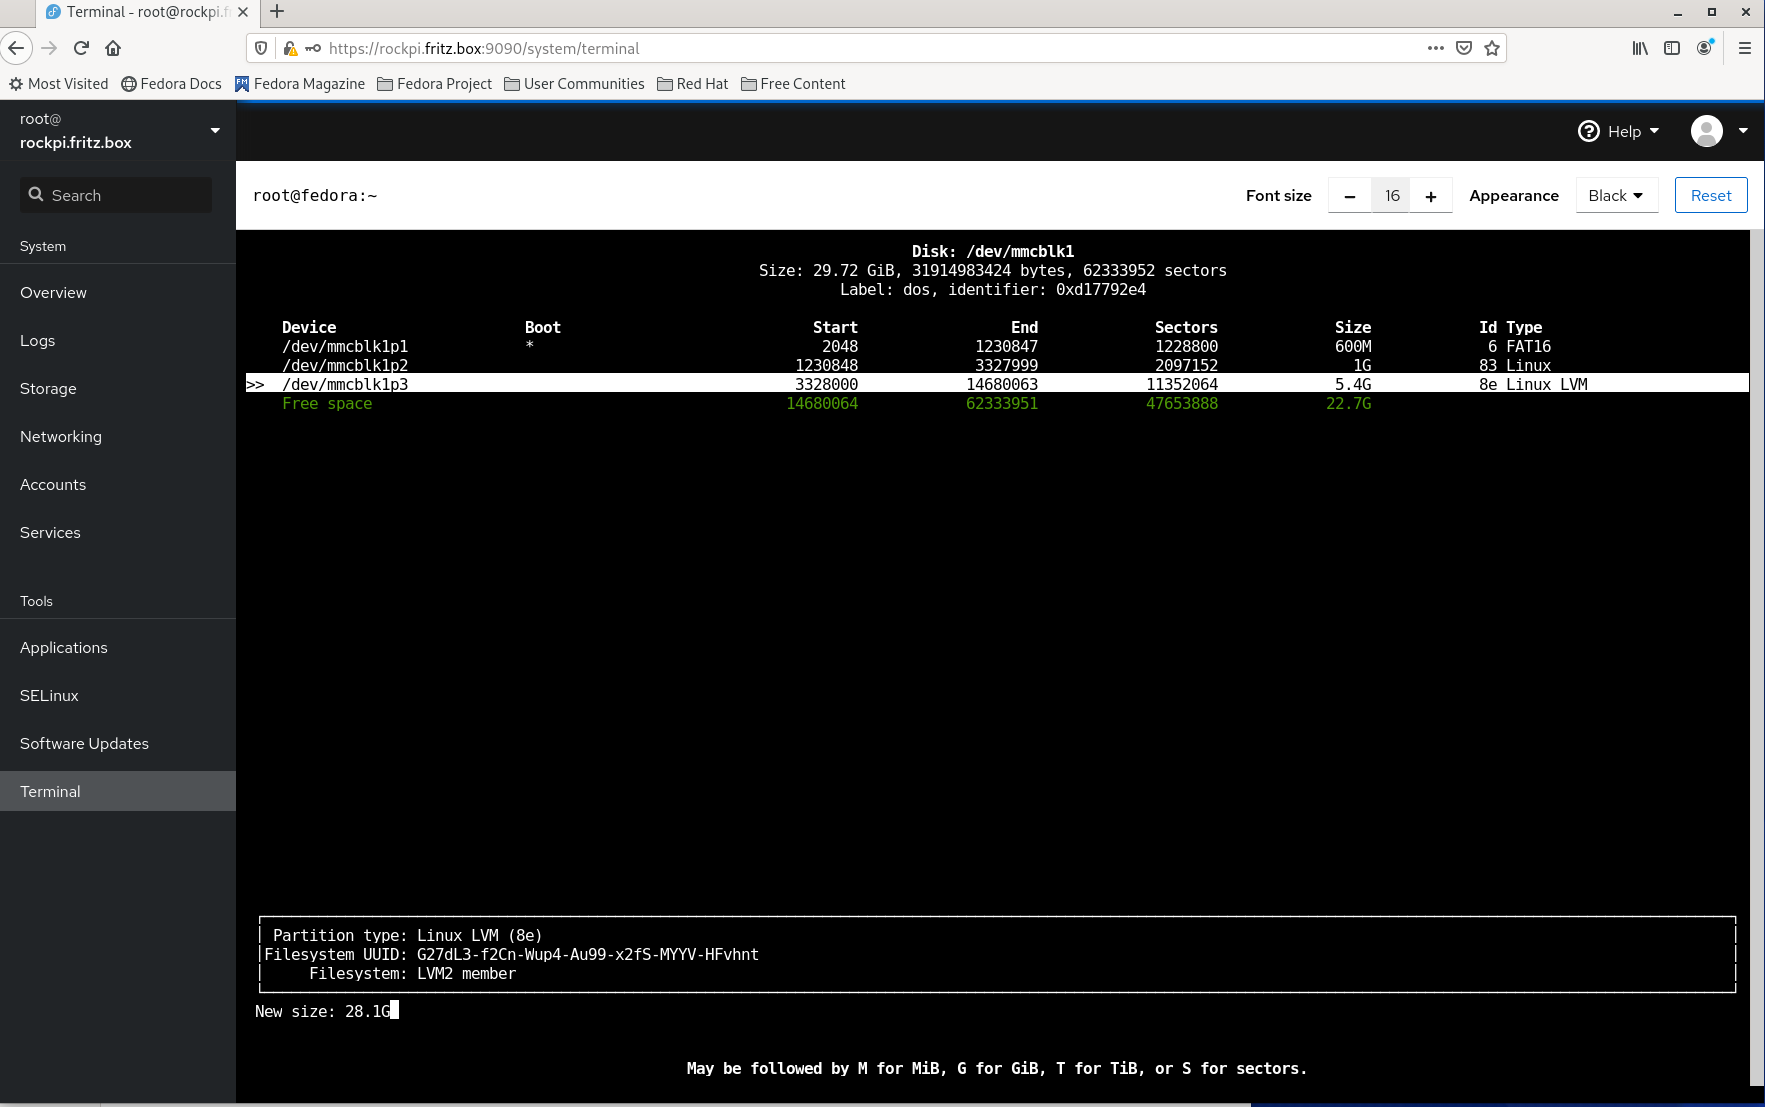
Invoke sudo cfdisk with that device name:
[…]$ sudo cfdisk /dev/mmcblk1 -
Select partition 3 (Type 8e Linux LVM) using <Cursor down> and then Resize using <Curser left>
-
The suggested size fills the complete disk.
In case of alternative 1 or 2 confirm with <Return>.
In case of alternative 3 select a size for system VG, as a rule of thumb at least 10GB, max. 30 GB.
Select "Write", confirm resizing and quit the program.
-
Resize the volume group
[…]$ sudo pvresize /dev/mmcblk1p3 Physical volume "/dev/mmcblk1p3" changed 1 physical volume(s) resized or updated / 0 physical volume(s) not resized -
Select "Storage" in Cockpit and inspect the Volume Group fedora in the upper right corner. The displayed size now shows an amount that indicates a complete fill of the entire disc rsp. as configured.
-
A click onto the fedora volume group brings up the logical volume view. In the "Logical volumes" list expand the root LV (/dev/fedora/root).
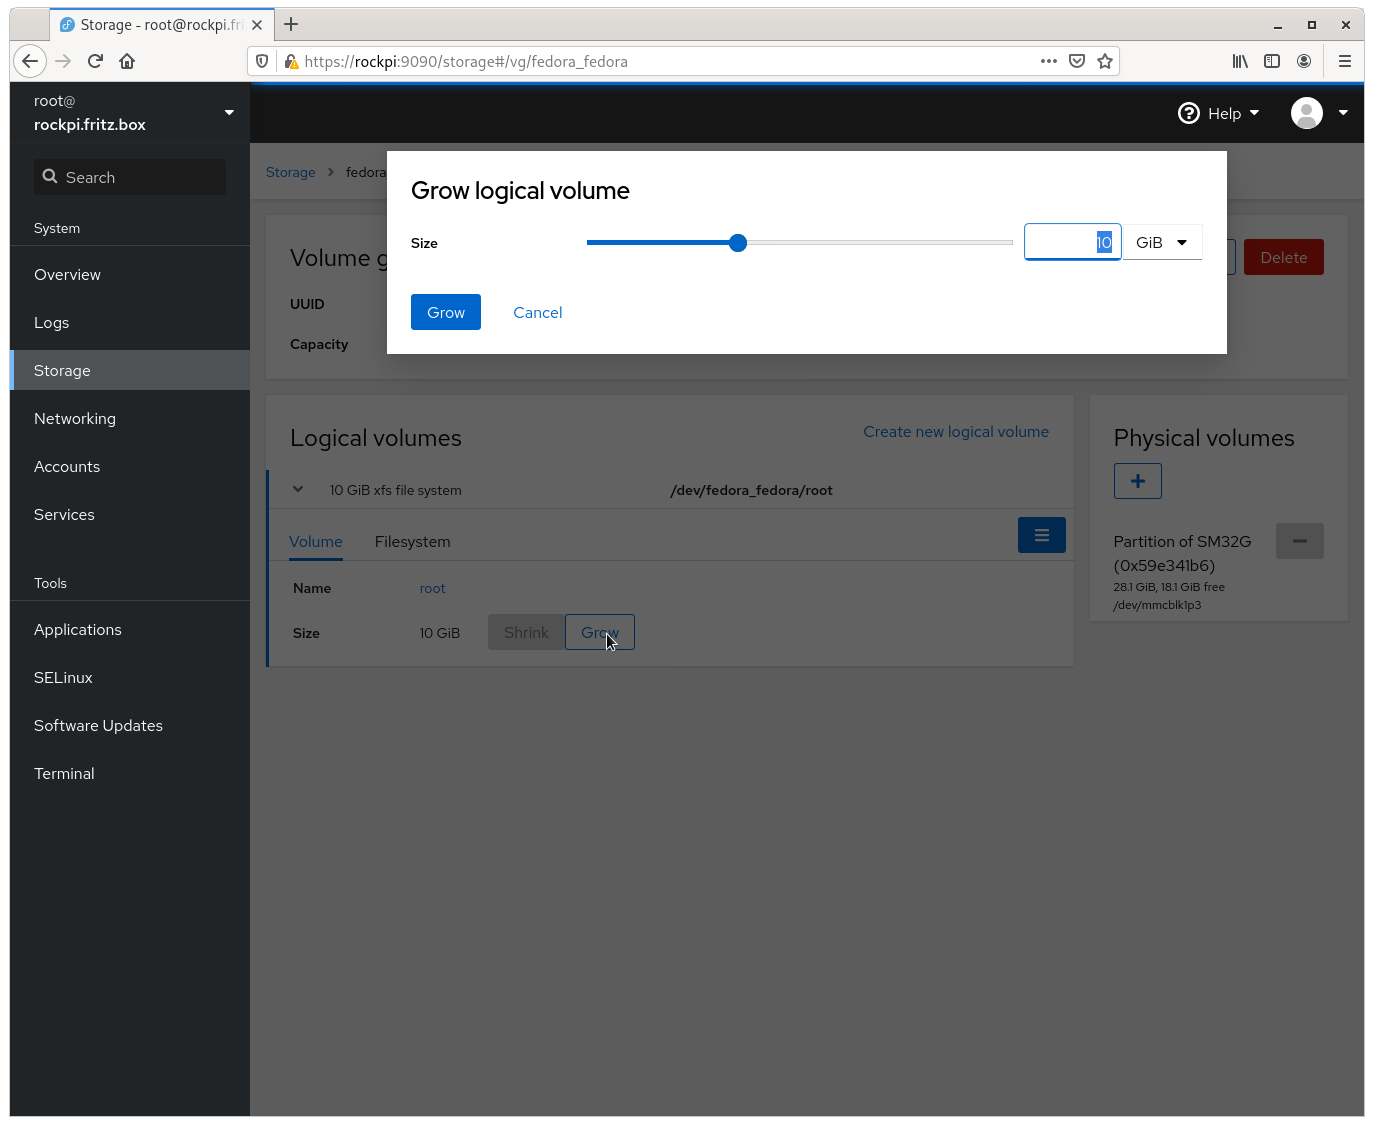
For alternative 1. select "Grow" and expand the volume to fill the complete available space.
For alternative 2. select "Grow" and expand the volume to sensible size. 10gb would be good to start with.
For alternative 3. select "Grow" and expand the volume to a size that still leaves room for the unanticipated. An initial size for root between 8 and 12 GB would be good to start with.
-
Go back to the terminal.
[…]$ sudo df -hConfirm that the size of the root file system is now of the specified value.
-
In case of alternative 3 use Cockpits storage to create an additional partition and volume group.
Later, when you install applications and services you will use Cockpit storage to create logiocal volumes and mount them at the appropriate location. As an example you may create a logical volume "postgresdata", create an XFS filesystem and mount it at /var/lib/pgsql before actually installing postgresql.
After all the major modifications to the file system, it is now advisable to reboot before any further work is done.
Troubleshooting
-
At the first system start the grub2 boot screen is displayed briefly, then the monitor remains dark.
Check if the network interface indicates a connection (the LEDs are on or blinking). In this case, it is likely that the device is fully booted and just the console interface is broken.
Because in this case Cockpit is started and active on the device, use your Fedora desktop and search the network segment, e.g. 192.168.158.0/24 for devices with active port 9090.
[…]$ sudo dnf install nmap
[…]$ sudo nmap -Pn -p9090 192.168.158.0/24
Starting Nmap 7.80 ( https://nmap.org ) at 2023-03-23 08:18 CEST
Nmap scan report for fritz.box (192.168.158.1)
Host is up (0.00052s latency).

PORT     STATE  SERVICE
9090/tcp closed nn-admin
MAC Address: 34:81:C4:14:21:B4 (AVM GmbH)

Nmap scan report for iMac.fritz.box (192.168.158.111)
Host is up (0.00051s latency).

PORT     STATE  SERVICE
9090/tcp closed nn-admin
MAC Address: 68:5B:35:97:9F:33 (Apple)
...
...
Nmap scan report for raspi3.fritz.box (192.168.158.116)
Host is up (0.00075s latency).

PORT     STATE SERVICE
9090/tcp open  nn-admin
MAC Address: B8:27:EB:5A:EC:84 (Raspberry Pi Foundation)

Nmap scan report for 192.168.158.172
Host is up (0.00068s latency).

PORT     STATE SERVICE
9090/tcp open  nn-admin
MAC Address: 06:BE:DE:31:C6:E2 (Unknown)
...
...
Nmap done: 256 IP addresses (12 hosts up) scanned in 2.38 seconds
Look for an entry with open state of port 9090 and no hostname or unknown hostname. Among them you will probably find the device you are looking for. In the example above it is 192.168.158.172.
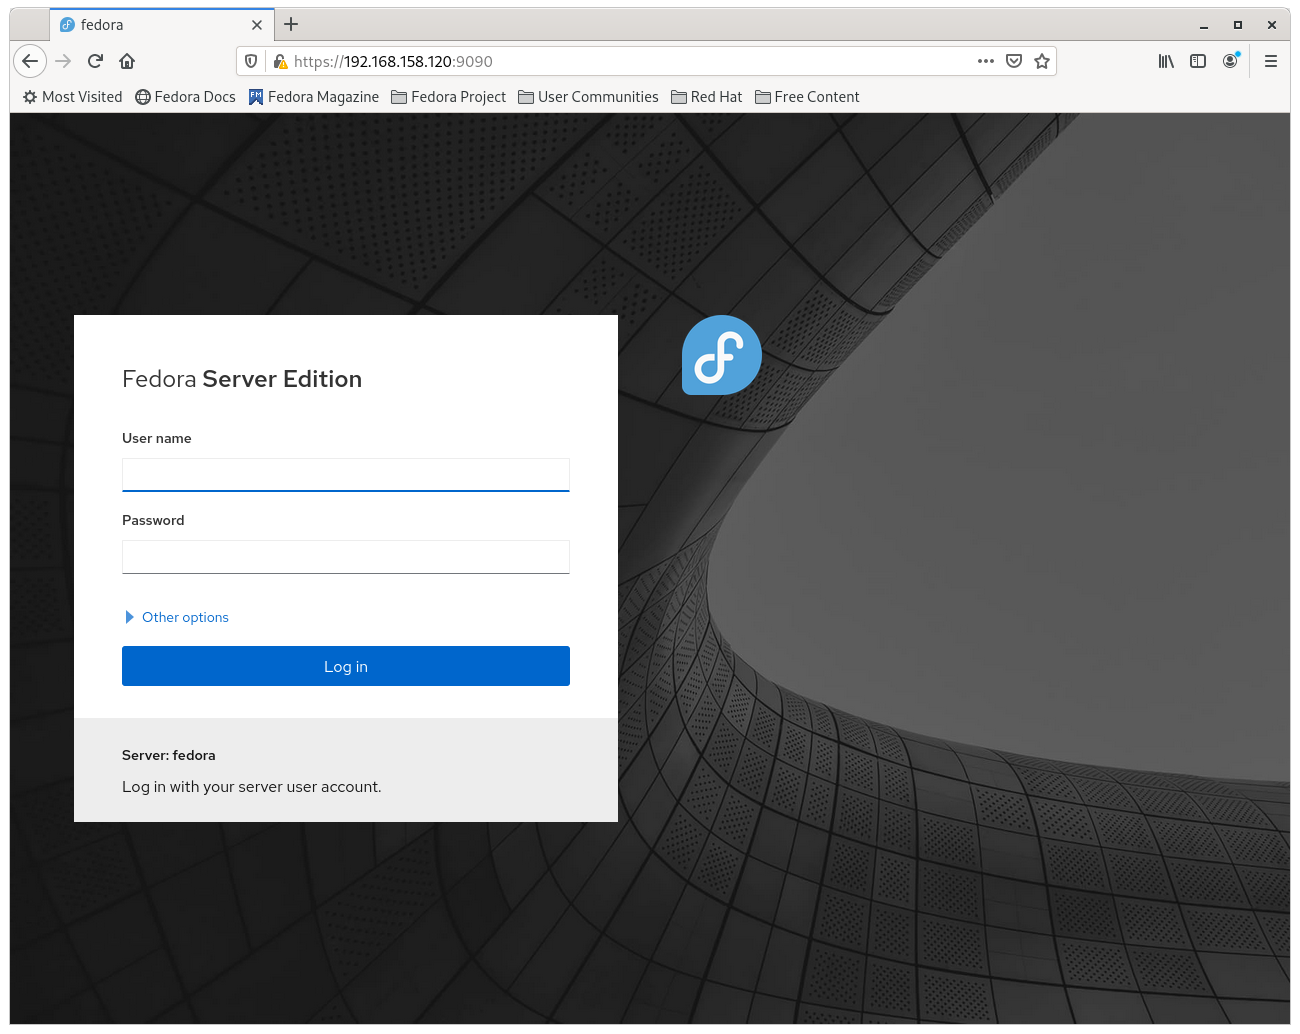
Enter the address https://192.168.158.172:9090 into your browser. If successful, a cockpit login page opens, which simply outputs "fedora" as the hostname (in the lower part of the login widget). Otherwise, check the other suitable addresses.
Unfortunately you can’t log in right now because you don’t know the password.
You have to rebuild the device operating system on SD card and add a SSH public key to be able to login via SSH as user root.
Beforehand you need to create pair of SSH keys if not already exist. It is best to create the key in the .ssh subdirectory of your home dir. It should not be secured by password to enable automatic processing. The naming with leading 'id_' und trailing types abbreviation, e.g. '_rsa' is just a common convention, yet helpful. Execute on the local desktop and adjust appropriately:
[…]$ cd
[…]$ mkdir ~/.ssh
[…]$ ssh-keygen -t rsa -b 4096  -C "root@example.com" -f ~/.ssh/<outputkeyfile>
As an example you may use the name "id_mysbc_rsa". Although the type rsa is widely used, you may adjust your key type accordingly.
Turn off the SBC, remove the SD card and connect it to your desktop again as in section "Preparations". Transfer the operating system image file again as in step 5 of that section but use an additional option:
[…]$ cd
[…]$ sudo arm-image-installer --image=Fedora-Server-38-1.6.aarch64.raw.xz --target=rockpro-rk3399 --addkey=~/.ssh/id_mysbc_rsa.pub  --media=/dev/mmcblk0
When the process has finished, reinstall the CD card in the SBC, and connect to power to start the device again.
Ping the address and as soon as you are connected, use ssh to log in.
[…]$ ping 192.168.158.120
[…]$ ssh -i .ssh/id_mysbc_rsa  root@192.168.158.172
You can now create an user account, set the password and add it to group wheel to grant administrative sudo privileges.
In your browser open again https://192.168.158.172:9090, login with your account and proceed with section "Final configuration".
Want to help? Learn how to contribute to Fedora Docs ›