Intercambiar entorno de escritorio
Different Fedora Linux variants (Spins/Labs) have different default environments. For example, the Fedora workstation uses GNOME as its default desktop environment, while the KDE spin will use KDE. Irrespective of what installation media you used to install Fedora Linux, you can easily try and switch to any of the many other desktop environments that are available without affecting your current desktop environment.
Installing additional desktop environments
You can list available desktop environments using the default package manager, dnf.
Since Fedora 41, in a terminal use the dnf environment list command to list all available desktop environments:
dnf environment list --available | grep desktopFor older Fedoras, use the dnf group list command to list all available desktop environments:
dnf group list -v --available | grep desktopInstall the required desktop environment using the dnf install command. Ensure to prefix with the @ sign, for example:
dnf install @kde-desktop-environmentSwitching desktop environments using a graphical user interface (GUI)
First, install the desired desktop environment as described in Installing additional desktop environments.
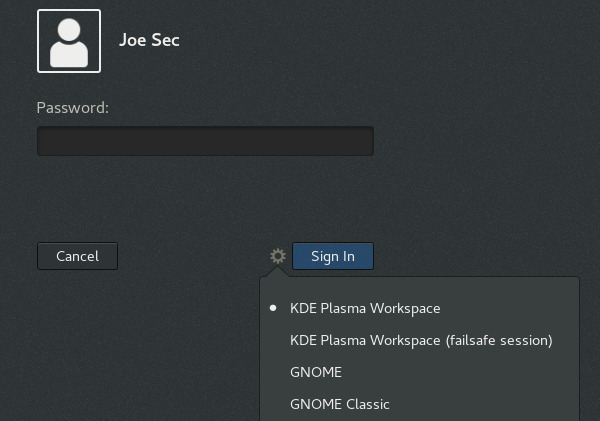
You can login to a different desktop for a single session using the login manager. For example, for the Gnome Display Manager (GDM) that is used by default on the Fedora Linux Workstation:
-
On the login screen, select a user from the list.
-
Click on the Preferences icon right below the password field. A window appears with a list of several different desktop environments.
-
Choose one, and enter password as usual.

Using switchdesk
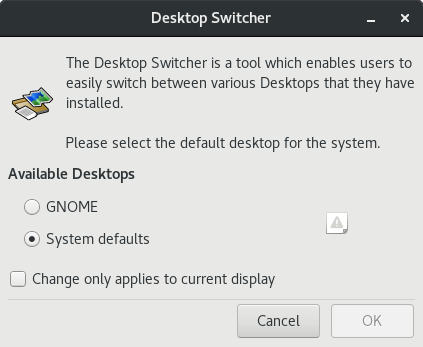
You also change your desktop environment using the switchdesk tool. It also allows you to change default desktop environment for individual users, and for all users.
-
Install the
switchdeskandswitchdesk-guipackages:dnf install switchdesk switchdesk-gui -
Run the Desktop Switching Tool application.
-
Select the default desktop from the list of available desktop environments, and confirm.

Switching desktop environments using the command line interface (CLI)
First, install the desired desktop environment as described in Installing additional desktop environments.
Install the switchdesk package:
dnf install switchdeskPass the selected desktop environment as the only argument to the switchdesk command, for example:
switchdesk kdeSee the switchdesk(1) man page for more information.
Manually changing the default desktop
You can also change your default desktop environment using the /etc/sysconfig/desktop system configuration file. If this file does not exists, please create it. This file specifies the desktop for new users and the display manager to run when entering runlevel 5.
Please create/edit it using your preferred text editor. Note that you will need administrator (root) privileges to create or edit this file.
Correct values are:
DESKTOP="<value>", where <value> is one of the following:
-
GNOME- Selects the GNOME desktop environment. -
KDE- Selects the KDE desktop environment.
DISPLAYMANAGER="<value>", where <value> is one of the following:
-
GNOME- Selects the GNOME Display Manager. -
KDE- Selects the KDE Display Manager. -
XDM- Selects the X Display Manager.
Want to help? Learn how to contribute to Fedora Docs ›